Step by step Guide to Creating an Epoxy Table
Share
Some Process of producing an Epoxy-Wood furniture.
Epoxy table production involves a lots of different process that combines craftsmanship with creativity. Here's a step-by-step overview:
1. Wood Selection and Preparation
 Before start crafting a product, we try to find best wood slabs all around the world.
Very old and dried ones.
After the process of we bring them to our factory and store too many years to elimine the water in the woods.
We usually choose high-quality wood, such as walnut or chestnut, known for its durability and rich grain patterns.
The wood is dried and cut into slabs to ensure stability and prevent cracking or warping. At this stage, imperfections like cracks or holes are evaluated and may later be filled with epoxy for added visual interest.
2. Design Planning
 We are picking the slabs among thousands of wood slab for the best wood slab matches depending on Size and Customer's Demand. Popular designs include river tables, where resin mimics the flow of water between two slabs.
3. Mold Preparation
 A custom mold is produced to shape the epoxy layer. The wood slabs are placed securely in the mold. It is important the mold the mold does not leak and is easily separated from the raw table after curing
4. Epoxy Resin Mixing
The epoxy resin is mixed with a hardener in a precise ratio. This is a critic process for a durable resin table. The mixture can be clear or tinted with pigments for color effects depending on customer's demand.
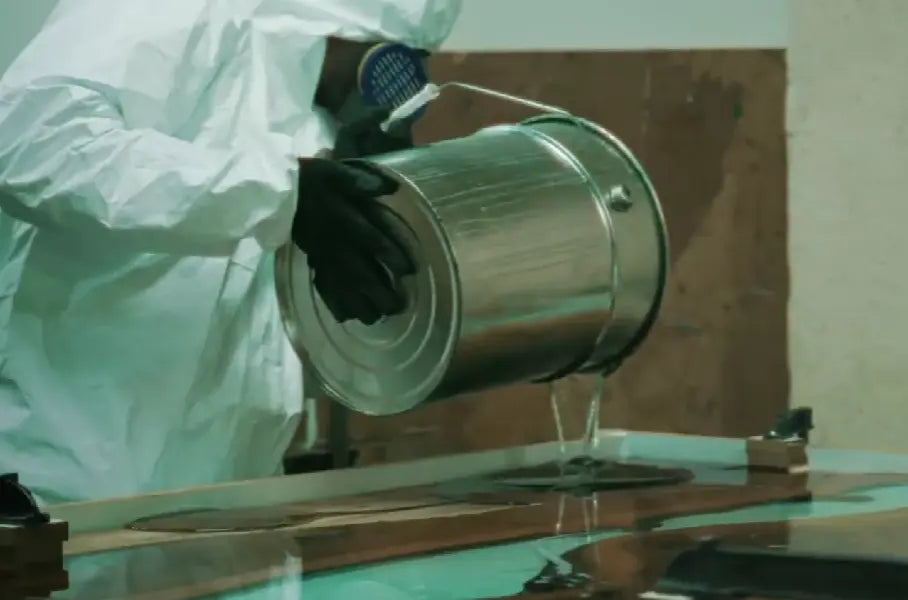
5. Pouring the Resin
The resin is carefully poured on the wood in the mold, flowing around the wood slabs. Multiple layers may be applied but we as Gizzwood pour the resin as one layer. This provide beatiful appearance . this single casting process requires expertise as it requires mixing the substances in the epoxy in the correct proportion and there are very few companies in the sector that can do this process. 
6. Curing and Shaving the raw table and Sanding
Curing takes like 10-12 days.This is also depend on your recipe. We prefer slow curing.This process is so crucial because it provide sturdiness for the table. Unlike other companies, we patiently wait for our product to cure.
After the table cured by the help of our CNC router machines we are shawing the table for the final dimension.
After we trimmed our raw table, sanding process is starting. For several days , we are sanding the tables with hands.
7. Finishing Touches
After all those processes are done we are waxing and polishing the table to give a smooth appearance.
Then as finishing touch we apply our special protective wood oil.

8. Quality Control
The final product is inspected to ensure structural integrity and visual appeal. Once approved, the table is ready for delivery.

We deliver it to you safely in aluminium strengthened wooden crates in 2-5 days.
To Understand Pros and Cones of epoxy resin products, read the related blog
To see our Luxury products, visit our online store
